
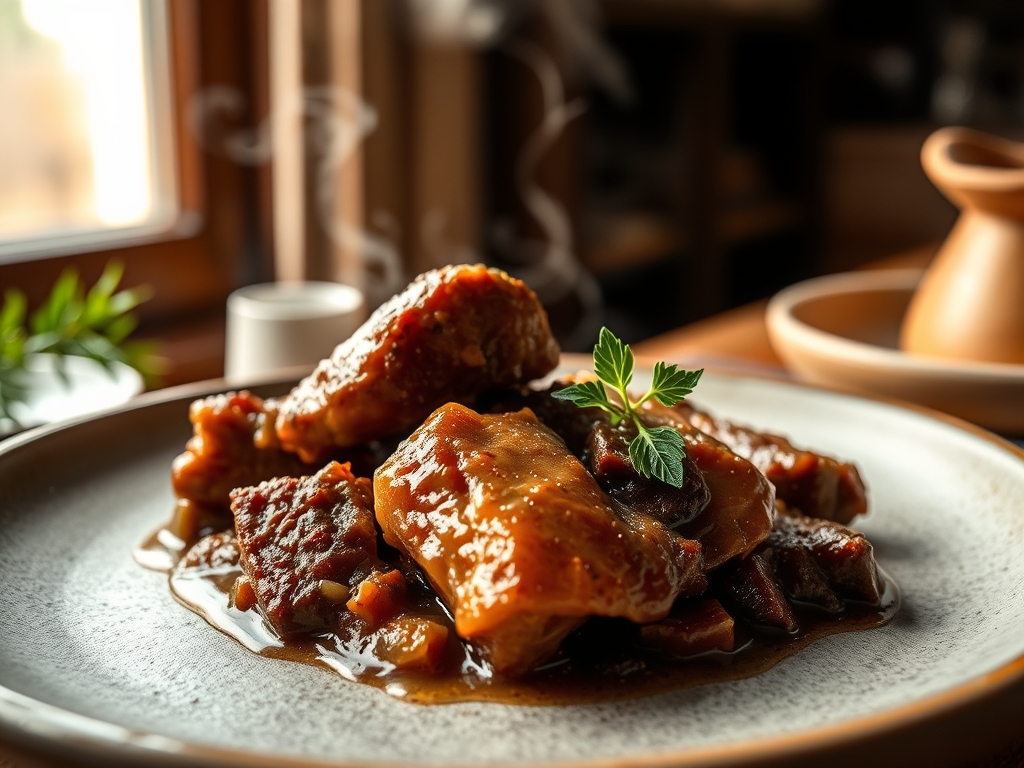
Picture this: a heavy-bottomed Dutch oven sits on the burner; its surface is radiating a steady heat that promises something transformative. You drop a cube of beef into the shimmering oil and the sound is instantaneous. It is a sharp, aggressive sizzle that signals the start of the Maillard reaction. We are not just making dinner; we are mastering the art of beef recipes with stew meat. This is the ultimate comfort food evolution. As the kitchen fills with the scent of toasted proteins and caramelized onions, you realize that stewing is not just a cooking method; it is a slow-motion magic trick. We are taking tough, connective tissue and turning it into something so tender it practically dissolves on the tongue. This process requires patience, but more importantly, it requires a bit of molecular savvy. By the time we deglaze that pan, you will understand exactly why certain cuts behave the way they do under pressure. Grab your favorite apron and a glass of something bold. We are about to turn humble ingredients into a masterpiece of texture and depth.
The Gathers:
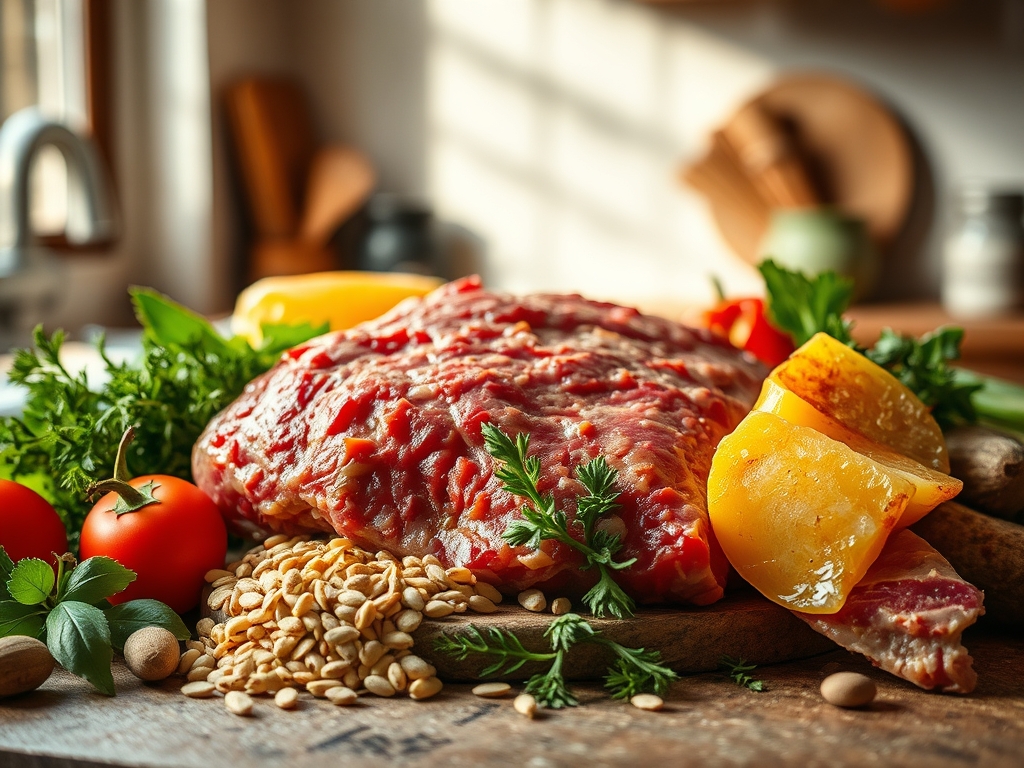
To achieve a truly viscous and glossy sauce, your mise-en-place must be precise. Start with three pounds of beef chuck; specifically look for heavy marbling. You will need a high-smoke-point fat like avocado oil or rendered tallow to ensure the sear happens at 400 degrees Fahrenheit without scorching. For the aromatics, gather yellow onions, carrots, and celery. These form your mirepoix, providing the foundational sugars for caramelization. Use a microplane to zest two cloves of garlic and a small knob of ginger for a piquant kick. You will also need high-quality beef bone broth, tomato paste for umami depth, and a dry red wine like Cabernet Sauvignon to provide the acidity necessary to break down muscle fibers.
Smart Substitutions: If you are avoiding alcohol, replace the wine with a tablespoon of balsamic vinegar mixed into extra beef stock. For a deeper earthy profile, swap half the carrots for parsnips or celery root. If you lack a digital scale, remember that one pound of cubed beef is roughly two cups. Always use kosher salt rather than table salt; the larger grains allow for better friction when seasoning the meat surfaces.
The Clock: Chef's Flow
Precision timing is the difference between a masterpiece and a mushy mess. Your active prep time is 30 minutes. This includes dicing the vegetables with a sharp chef knife and patting the meat dry with paper towels. The searing phase takes 15 to 20 minutes because you must work in batches. If you crowd the pan, the temperature drops and the meat boils in its own juices rather than browning. The "low and slow" simmer requires 2.5 to 3 hours. This is the Chef's Flow: use the first hour of simmering to clean your station with a bench scraper and prep any side dishes. The final 30 minutes are for the "reduction phase," where you remove the lid to let the sauce concentrate.
The Masterclass:
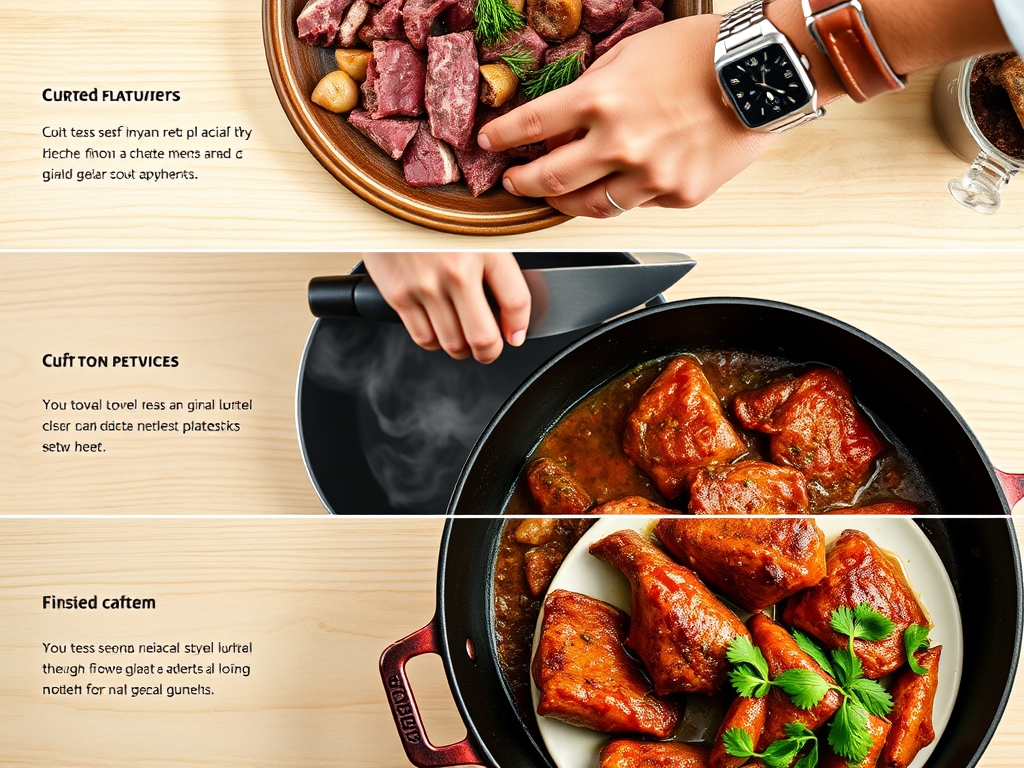
1. The Critical Sear
Using tongs, place the seasoned beef into a heavy-bottomed skillet. Do not move them for three minutes. You are looking for a deep mahogany crust.
Pro Tip: This is the Maillard reaction. It occurs when amino acids and reducing sugars react under high heat to create hundreds of different flavor compounds. If the meat is wet, the energy goes into evaporating moisture rather than browning.
2. Deglazing the Fond
Once the meat is removed, pour the wine into the hot pan. Use a wooden spoon to scrape up the brown bits stuck to the bottom.
Pro Tip: Those bits are called fond. They contain concentrated protein essences that provide the "soul" of the stew. The acidity in the wine helps dissolve these particles, integrating them into your liquid base.
3. Sweating the Aromatics
Add your mirepoix to the pan. Cook until the onions are translucent and slightly golden.
Pro Tip: This is called sweating. By cooking vegetables slowly in fat, you draw out their moisture and soften their cell walls without browning them too quickly. This ensures they meld into the sauce later.
4. The Tomato Paste Bridge
Clear a spot in the center of the pan and add the tomato paste. Let it cook until it turns a dark brick red.
Pro Tip: This is pinçage. Toasting the tomato paste removes its raw metallic taste and develops a rich, caramelized sweetness that acts as a bridge between the meat and the vegetables.
5. The Long Braise
Return the beef to the pot and add the broth until the meat is three-quarters submerged. Bring to a boil, then immediately drop to a whisper of a simmer.
Pro Tip: At 160 degrees Fahrenheit, collagen begins to melt into gelatin. This transformation is what gives the stew its silky mouthfeel. If the temperature is too high, the muscle fibers will contract and become stringy.
6. The Final Emulsification
Once the meat is tender, whisk in a small knob of cold butter or a slurry of cornstarch if you prefer a thicker body.
Pro Tip: This creates an emulsion. The fats and liquids bind together to create a glossy, coat-the-back-of-the-spoon consistency that carries flavor across the entire palate.
The Deep Dive:
Macro Nutrition: A standard serving of this beef stew provides approximately 35g of protein, 12g of healthy fats, and 15g of complex carbohydrates. It is rich in iron, zinc, and Vitamin B12.
Dietary Swaps: For a Keto version, omit the potatoes and use radishes or cauliflower florets instead. For a Vegan alternative, use "soy curls" or king oyster mushrooms and vegetable demi-glace. For a Gluten-Free thickener, use arrowroot powder or simply puree a portion of the cooked vegetables back into the sauce.
The Fix-It:
- Too Salty? Drop in a peeled, halved potato for 20 minutes; it will absorb excess sodium like a sponge.
- Too Thin? Simmer with the lid off or use a saucier to reduce a cup of the liquid separately before adding it back.
- Tough Meat? It simply hasn't cooked long enough. If the collagen hasn't converted to gelatin, give it another 30 minutes.
Meal Prep Science: Stew actually tastes better on day two. As it cools, the flavors continue to infuse and the gelatin sets. When reheating, do it slowly on the stovetop. Adding a splash of water or broth helps aerate the sauce and prevents the fats from separating.
The Wrap-Up:
Mastering beef recipes with stew meat is like learning a secret language of the kitchen. It is about understanding that heat is a tool and time is an ingredient. When you lift that lid and see the rich, dark gravy bubbling around fork-tender beef, you know you have succeeded. This dish is more than just sustenance; it is a warm hug in a bowl, backed by the rigorous laws of chemistry. Now, go forth, grab your saucier, and turn that humble chuck roast into a culinary legend. Your kitchen is your laboratory, and the results are delicious.
The Kitchen Table:
Why is my stew meat still tough after two hours?
The beef likely hasn't reached the temperature where collagen breaks down into gelatin. Continue simmering at a low heat. Toughness usually means the connective tissue is still intact; it requires more time, not more heat, to become tender.
Can I overcook beef in a stew?
Yes. While the connective tissue softens, the actual muscle fibers can eventually become dry and "mealy" if boiled aggressively for too long. Always aim for a gentle simmer where only a few bubbles break the surface occasionally.
What is the best cut for beef stew?
Chuck roast is king. It contains the perfect ratio of lean muscle to connective tissue and fat. Avoid "lean" stew meat packs, as they often contain round steak which lacks the collagen needed for a silky, tender result.
Do I have to brown the meat first?
Technically no, but you should. Browning creates the Maillard reaction, which develops deep, complex flavors that boiling cannot achieve. Without searing, your stew will taste flat and one-dimensional. It is the most important step for flavor depth.