
Imagine the sound of a heavy-bottomed skillet meeting a high-heat flame; that rhythmic sizzle is the opening note of a culinary masterpiece. When you crack open a premium tin or slice into a fresh fillet, you are not just making lunch; you are engineering a high-protein symphony. Mastering tuna salmon recipes requires more than just a can opener. It demands an understanding of how delicate marine fats interact with heat and acidity to create something truly transcendent. We are moving beyond the basic mayo-laden salads of our childhood and stepping into a world where texture, temperature, and technique reign supreme.
The magic happens when the lean, muscular flakes of tuna meet the rich, adipose-heavy profile of salmon. This pairing is a nutritional powerhouse, but from a chef's perspective, it is a playground for structural contrast. We are going to explore seven distinct ways to blend these oceanic titans, ranging from crispy pan-seared cakes to silky, cold-emulsified mousses. Whether you are looking for a quick post-workout fuel or a sophisticated dinner party centerpiece, these tuna salmon recipes provide the perfect canvas for bold flavors like zesty citrus, pungent aromatics, and spicy ferments. Get your apron ready; we are about to turn your kitchen into a high-end seafood bistro.
The Gathers:
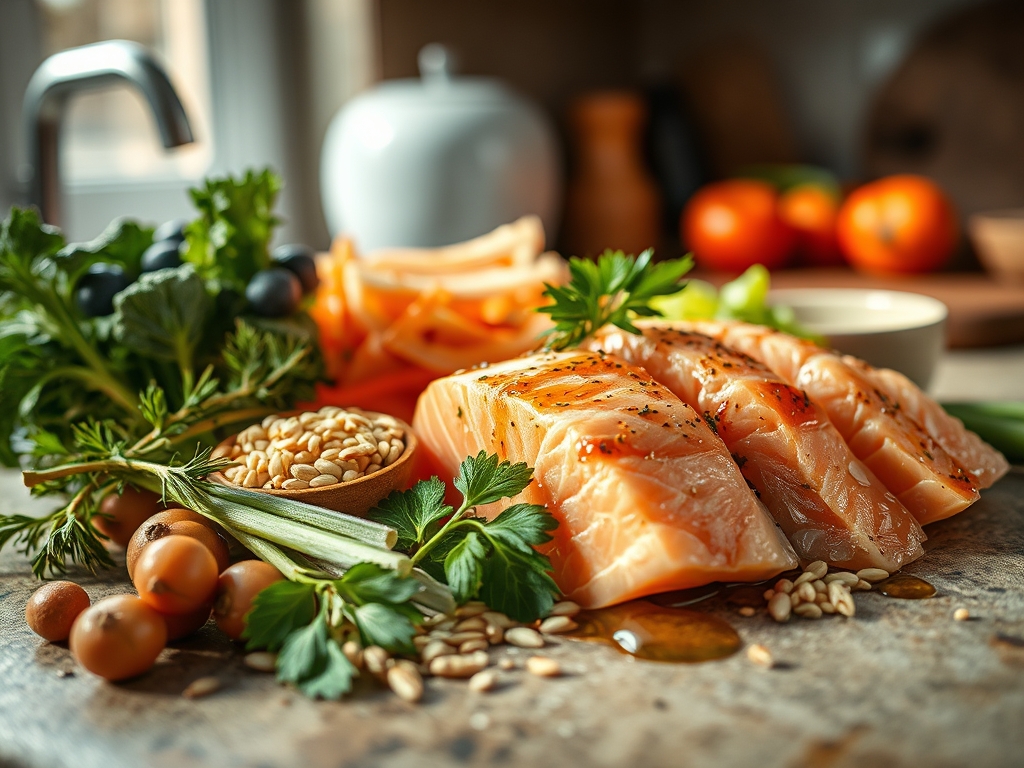
To achieve professional results, your mise-en-place must be precise. Start with your proteins: if using canned varieties, look for "solid white" albacore and "wild-caught" pink salmon to ensure large, meaty flakes rather than a mushy paste. If you are using fresh cuts, ensure they are sushi-grade and chilled to exactly 38 degrees Fahrenheit to maintain structural integrity during the dice.
You will need a high-quality fat source to act as a binder. While traditional mayonnaise works, a thick Greek yogurt or a viscous avocado oil emulsion provides a cleaner palate. For aromatics, gather fresh dill, capers for a piquant punch, and shallots finely minced with a sharp chef's knife. Do not forget your acids; fresh lemon zest and rice vinegar are essential to cut through the heavy lipids of the fish.
Smart Substitutions:
If you are out of fresh herbs, use one-third the amount of dried herbs, as their oils are more concentrated. No capers? Finely chopped green olives or cornichons provide that same salty, acetic hit. For a dairy-free binder, a "flax egg" or a spoonful of diomedes mustard can help aerate and bind your patties without altering the flavor profile significantly.
The Clock:
Efficiency in the kitchen is all about "Chef's Flow." This means grouping tasks to minimize downtime. For these tuna salmon recipes, expect a total active time of 15 minutes and a cook time of 10 minutes.
The flow begins with the "Cold Prep": dicing, zesting, and mixing your binders. This takes about 8 minutes. Next is the "Setting Phase," where the mixture rests in the refrigerator for 5 minutes. This is a critical scientific step; it allows the proteins to hydrate and the binders to firm up, ensuring your cakes do not fall apart in the pan. Finally, the "Heat Phase" involves a quick 3-to-4 minute sear per side. By the time your skillet is hot, your prep is done, and your kitchen is clean.
The Masterclass:
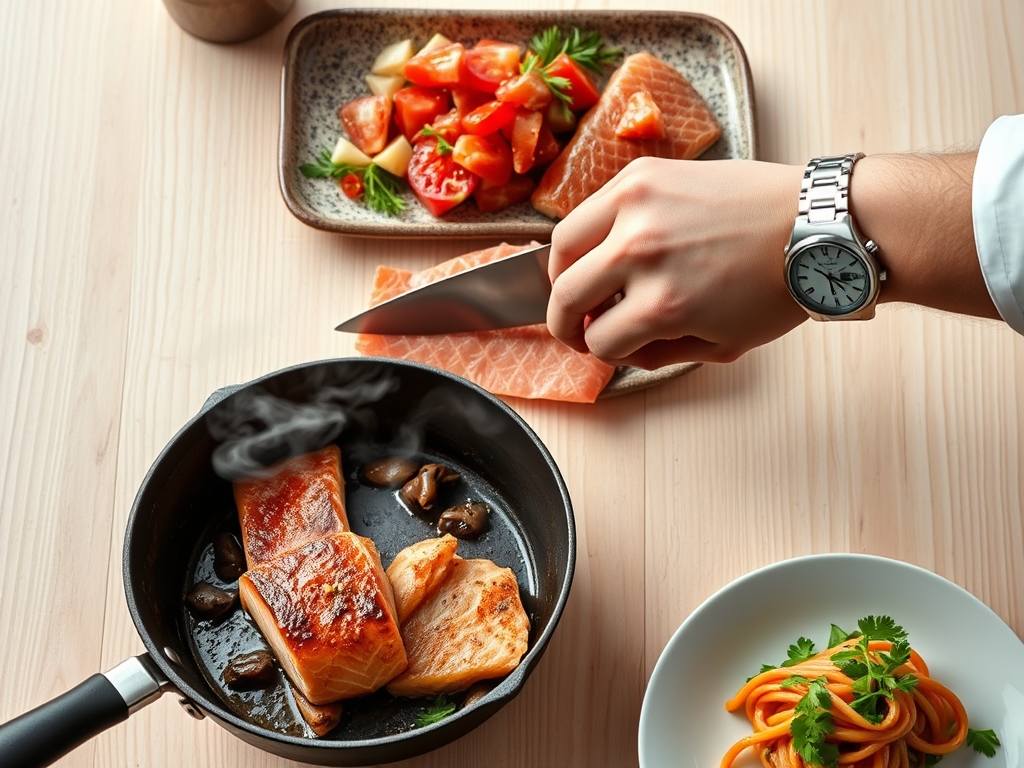
1. The Precision Dice and Drain
Begin by draining your canned fish thoroughly using a fine-mesh sieve. If using fresh fish, use a bench scraper to move your uniform cubes into a chilled stainless steel bowl.
Pro Tip: Moisture is the enemy of the Maillard reaction. By removing excess water, you ensure that the fish sears rather than steams, resulting in a golden-brown crust.
2. The Emulsion Fold
In a separate small bowl, whisk your binder, acids, and spices until they are fully integrated. Gently fold this into the fish using a silicone spatula.
Pro Tip: Avoid over-mixing. You want to maintain the "flake" of the fish. Over-working the proteins can lead to a rubbery texture due to excessive myosin bonding.
3. The Structural Chill
Shape your mixture into uniform discs using a metal ring mold or a measuring cup. Place them on a parchment-lined tray and refrigerate.
Pro Tip: This stage utilizes "thermal equilibrium." Chilling the fats in the binder helps them act as a temporary glue, which prevents the patties from disintegrating when they hit the hot oil.
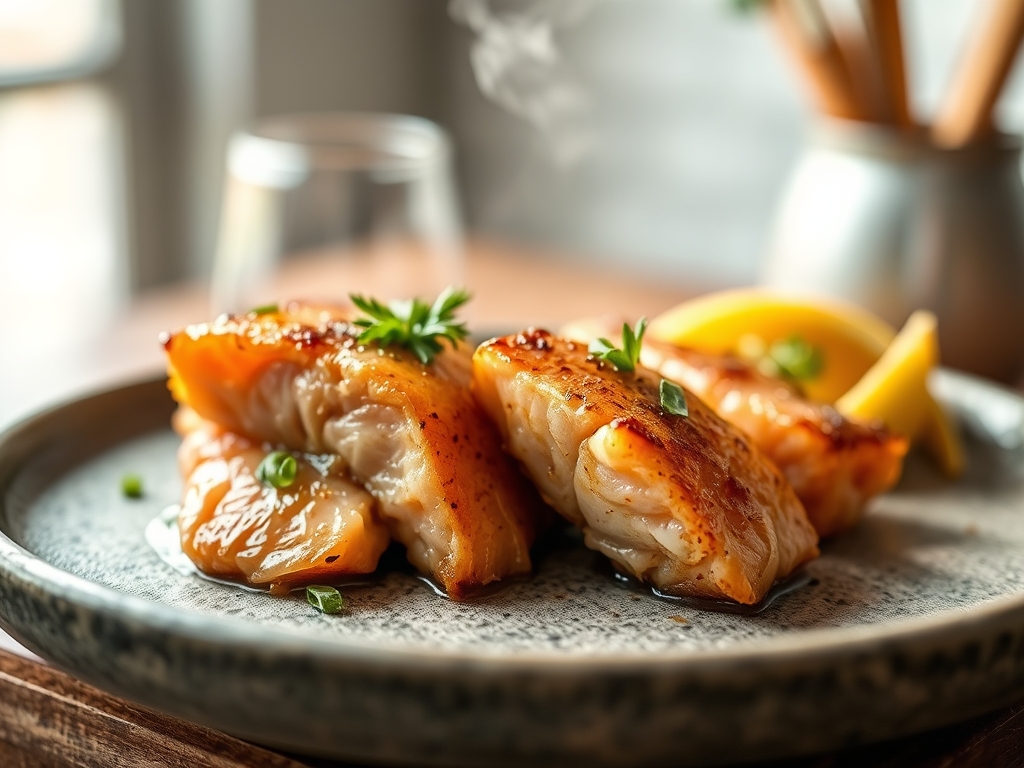
4. The High-Heat Sear
Heat a heavy-bottomed skillet (cast iron is best) and add a high-smoke-point oil like grapeseed. Place the cakes in the pan using offset tongs.
Pro Tip: Listen for the sizzle. This indicates that the surface moisture is evaporating instantly. Leave them undisturbed for at least 3 minutes to allow the enzymatic browning to create a flavor-rich seal.
5. The Rest and Carryover
Remove the cakes from the heat when they reach an internal temperature of 140 degrees Fahrenheit. Let them rest on a wire rack for two minutes.
Pro Tip: This accounts for thermal carryover. The internal temperature will rise another 5 degrees off the heat, ensuring the center is perfectly cooked without becoming dry or chalky.
The Deep Dive:
From a nutritional standpoint, these tuna salmon recipes are an athlete's dream. You are looking at a macro profile dominated by lean protein and Omega-3 fatty acids (EPA and DHA), which are essential for cognitive function and reducing inflammation. A standard serving provides roughly 35g of protein and only 12g of healthy fats.
Dietary Swaps:
For a Keto version, swap breadcrumbs for crushed pork rinds or almond flour to keep the net carbs near zero. Vegan friends can replicate this texture using a blend of mashed chickpeas and hearts of palm, seasoned with nori flakes to mimic that "ocean" umami. For a Gluten-Free (GF) approach, certified GF panko or cooked quinoa provides an excellent structural substitute.
The Fix-It:
- Patties Falling Apart: Your mixture is too wet. Add a tablespoon of coconut flour; it is highly absorbent and will stabilize the blend without changing the flavor.
- Bland Flavor: You likely missed the acid. A microplane of lemon zest or a dash of hot sauce will brighten the heavy fats instantly.
- Burnt Exterior, Cold Interior: Your heat was too high. Use a digital scale to ensure patties are no thicker than one inch, and use medium-high heat rather than maximum.
Meal Prep Science:
When reheating, avoid the microwave. The high-frequency waves vibrate water molecules too violently, making the fish "pop" and dry out. Instead, use an air fryer at 325 degrees for 4 minutes. This recirculates hot air to crisp the exterior while gently warming the fats inside, maintaining that day-one quality.
The Wrap-Up:
You are now officially equipped to handle the most versatile proteins in the pantry. By focusing on moisture control, temperature management, and the chemistry of binders, you have elevated a simple meal into a gourmet experience. These tuna salmon recipes are not just about feeding yourself; they are about the art of the sear and the science of the flake. So, grab your favorite skillet, trust your instincts, and remember that the best meals are the ones where you understand exactly why they taste so good.
The Kitchen Table:
How do I keep tuna salmon patties from being dry?
Ensure you do not over-drain the fish to the point of dehydration. Use a high-fat binder like avocado oil mayo or Greek yogurt, and always pull them off the heat at 140 degrees to allow for carryover cooking.
Can I use fresh salmon and canned tuna together?
Absolutely. This creates a sophisticated texture profile. Finely mince the fresh salmon to act as a "glue" for the larger, firmer flakes of the canned tuna. Ensure the fresh salmon is sushi-grade for the best results.
What is the best oil for frying fish cakes?
Use an oil with a high smoke point, such as grapeseed, avocado, or refined light olive oil. Avoid extra virgin olive oil or butter for the initial sear, as they will burn and become bitter at high temperatures.
How long can I store the raw mixture in the fridge?
You can store the prepared, uncooked mixture in an airtight container for up to 24 hours. The acidity from lemon juice may slightly "cook" the fish (like ceviche), so for best texture, fry them within 4 hours.