
Picture the scene: the kitchen is a humid, aromatic sanctuary where the scent of rosemary and rendered fat hangs heavy in the air. While the rest of the world is wrestling with a temperamental bird, you are leaning against the counter with a glass of bold Cabernet, watching a prime cut of protein transform into a masterpiece. Choosing beef recipes for thanksgiving is the ultimate power move for the modern host. It is about trading the dry, fibrous struggle of poultry for the succulent, melt-on-the-palate luxury of a perfectly seared tenderloin or a slow-braised short rib. We are moving beyond the traditional to embrace something more primal and satisfying. Whether you are aiming for a classic standing rib roast or a decadent beef Wellington, the goal is a centerpiece that demands respect. This guide will walk you through the chemistry of the sear and the physics of the rest, ensuring your holiday table is the one everyone talks about until next November.
The Gathers:
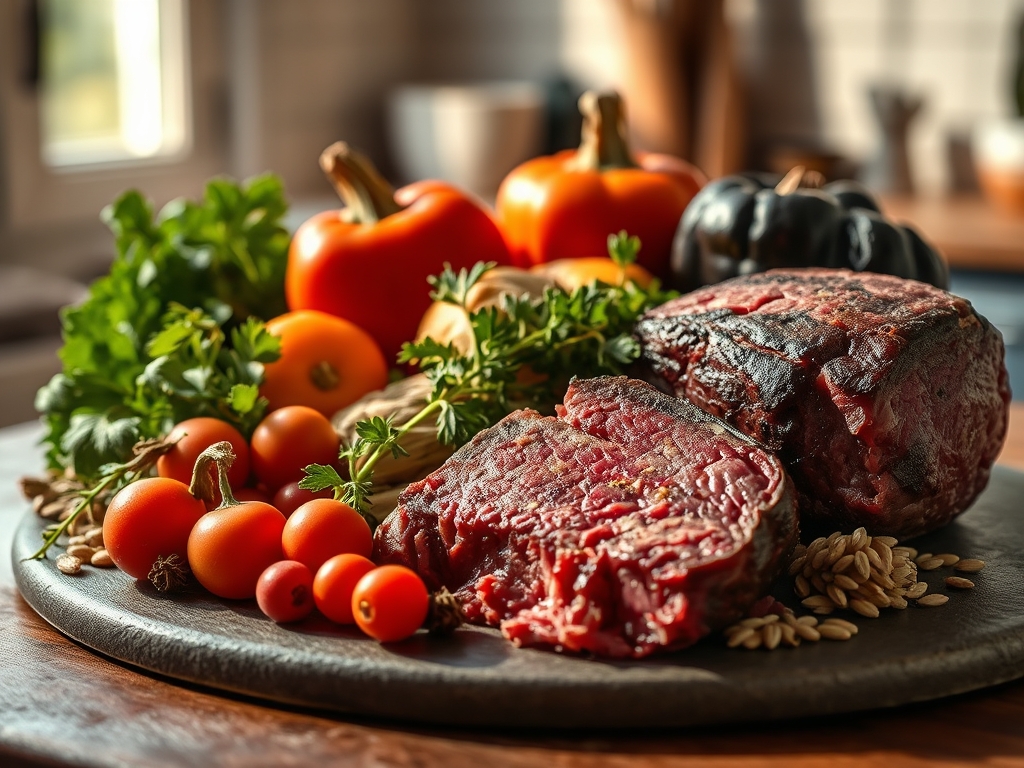
Creating a luxury beef experience starts with the mise-en-place. You need to look for marbling, which is the intramuscular fat that provides both flavor and lubrication during the cooking process. For these beef recipes for thanksgiving, prioritize Prime or Top Choice grades. Gather your aromatics: fresh thyme, rosemary, and heads of garlic sliced crosswise to expose the cloves. You will need a high-smoke-point oil like avocado or grapeseed for the initial sear; olive oil will smoke and turn bitter at the temperatures we require.
Smart Substitutions: If you cannot find a center-cut Chateaubriand, a high-quality eye of round can be transformed via a low-and-slow reverse sear, though it lacks the same buttery tenderness. For those avoiding dairy, replace the traditional butter basting with a rendered beef tallow or a high-quality vegan butter substitute that contains lecithin to help with browning. If you are out of red wine for deglazing, a combination of beef bone broth and a splash of balsamic vinegar provides the necessary acidity and depth to balance the rich proteins.
The Clock
Efficiency in a holiday kitchen is about Chef's Flow. This is the art of overlapping tasks so that nothing sits idle. Your total active prep time for these dishes averages 45 minutes, but the passive time is where the magic happens. A large roast requires at least 2 to 4 hours in the oven, depending on your target internal temperature. However, the most critical "time" is the rest period. You must factor in a minimum of 30 minutes for the meat to sit post-cook. This allows the internal pressure to stabilize and the juices to redistribute from the center back to the edges. While the beef rests, you have the perfect window to use your saucier to whisk together a pan sauce or finish your vegetable sides.
The Masterclass
1. Tempering and Surface Preparation
Remove your beef from the refrigerator at least 90 minutes before cooking. Use paper towels to blot the surface until it is bone-dry. Moisture is the enemy of a good crust. Season aggressively with kosher salt from a height to ensure even distribution.
Pro Tip: This process utilizes osmosis. Salt initially draws moisture out, but given enough time, the brine is reabsorbed into the muscle fibers, seasoning the meat deeply and breaking down tough proteins for a more tender bite.
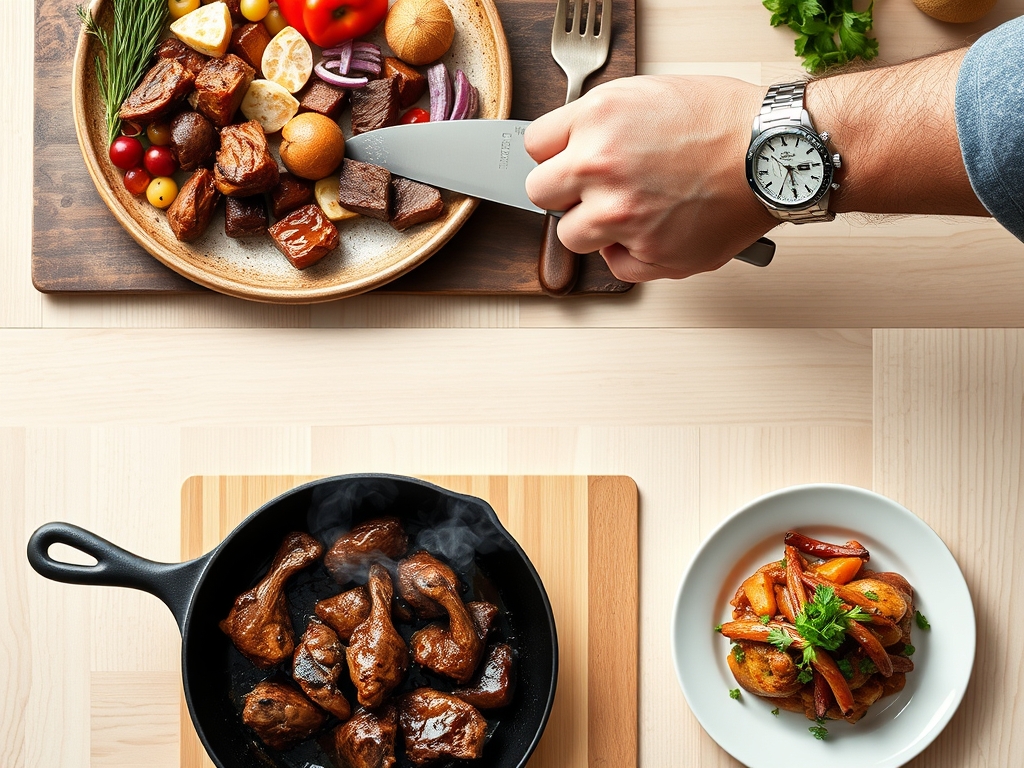
2. The High-Heat Sear
Heat a heavy-bottomed skillet (cast iron is king here) until it is shimmering. Lay the beef away from you to avoid oil splashes. Use tongs to press the meat down, ensuring maximum surface contact. Sear every side until a deep, mahogany crust forms.
Pro Tip: This is the Maillard Reaction. It is a chemical reaction between amino acids and reducing sugars that creates hundreds of different flavor compounds. Without a dry surface and high heat, your meat will steam rather than sear.
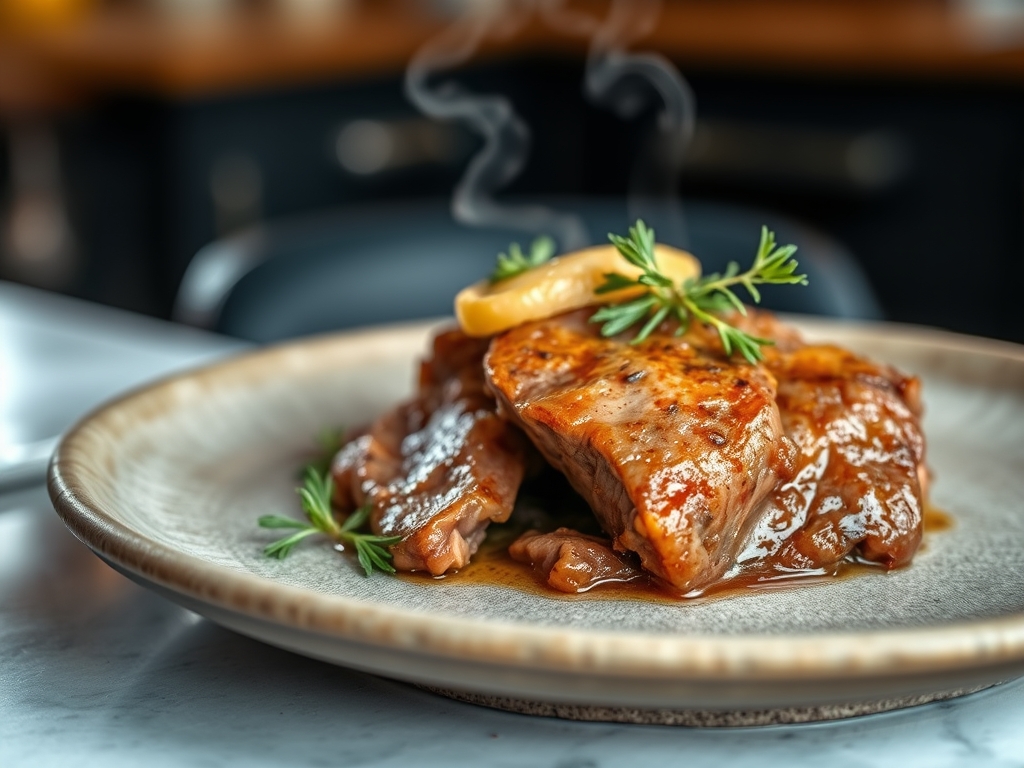
3. Aromatics and Basting
Once the sear is established, drop the heat and add a knob of cold butter, smashed garlic, and woody herbs. Use a large spoon to continuously bathe the beef in the foaming butter. This is known as arrosage.
Pro Tip: Basting creates a thermal jacket around the meat. The fat carries the essential oils from the herbs into the nooks and crannies of the sear, while the milk solids in the butter undergo further browning to add a nutty profile.
4. Precision Roasting
Transfer the beef to a roasting rack set over a sheet pan. Slide a digital scale-calibrated probe thermometer into the thickest part of the meat. Roast at a low temperature (around 250F) until you are 5 degrees away from your target.
Pro Tip: Low-temperature roasting minimizes the gray band of overcooked meat beneath the crust. It ensures an edge-to-edge pink finish by allowing the heat to migrate slowly and evenly toward the center.
5. The Strategic Rest
Move the beef to a bench scraper-cleaned carving board. Do not tent it tightly with foil; this will trap steam and soften your beautiful crust. Let it sit undisturbed.
Pro Tip: This accounts for thermal carryover. The internal temperature will continue to rise by 5 to 10 degrees after removal from the heat. Resting also allows the muscle fibers to relax and reabsorb the viscous juices.
The Deep Dive
Macro Nutrition: Beef is a powerhouse of bioavailable protein, B12, and zinc. A standard 6-ounce serving provides approximately 45g of protein. To keep it balanced for the holidays, pair your beef with fiber-rich roasted root vegetables rather than heavy starches.
Dietary Swaps: For a Keto-friendly version, serve with a marrow-based butter. For Gluten-Free guests, ensure your pan sauce is thickened with a cornstarch slurry or by reduction rather than a flour-based roux. For a Vegan alternative at the same table, a "Lion's Mane Mushroom Roast" treated with the same searing and basting techniques offers a surprisingly similar texture.
The Fix-It:
- Gray Meat: If your meat looks gray, your pan wasn't hot enough. Fix it by finishing with a kitchen torch or a very brief, high-heat broil.
- Tough Texture: You likely cut with the grain. Always slice perpendicular to the muscle fibers to shorten them, making the meat easier to chew.
- Broken Sauce: If your red wine reduction separates, whisk in a tablespoon of cold water or a cube of cold butter (monter au beurre) to re-emulsify the fats.
Meal Prep & Reheating: To maintain "day-one" quality, reheat beef slices in a shallow pan with a splash of beef broth covered tightly with foil at 300F. This creates a gentle steam environment that prevents the proteins from tightening and becoming rubbery.
The Wrap-Up
Mastering beef recipes for thanksgiving is about more than just a meal; it is about the theater of the kitchen and the joy of sharing something truly exceptional. When you pull that roast from the oven, the deep, umami scent will instantly signal to your guests that they are in for a treat. By focusing on the science of heat and the patience of the rest, you have elevated a simple dinner into a culinary event. Now, grab your sharpest carving knife, slice into that perfectly pink center, and let the celebration begin.
The Kitchen Table
Can I cook the beef the day before?
It is best to cook beef fresh to preserve the texture. However, you can sear it a day early and perform the final roast on Thanksgiving. Always bring the meat to room temperature before the final oven stage.
What is the best cut for a crowd?
A whole beef tenderloin or a standing rib roast are the gold standards. They offer consistent results and high visual impact. For a more budget-friendly option, a tri-tip roast provides excellent flavor when sliced thinly against the grain.
How do I know when the beef is done?
Always use an instant-read thermometer. For medium-rare, pull the beef at 125F to 130F. The temperature will climb to the perfect 135F while resting. Never rely on "touch" tests for expensive holiday cuts; precision is vital.
Why is my pan sauce thin?
You likely didn't reduce the liquid enough or lacked sufficient gelatin. Continue simmering to evaporate water and concentrate flavors. Alternatively, whisk in a small amount of cold butter at the very end to add body and a glossy finish.