
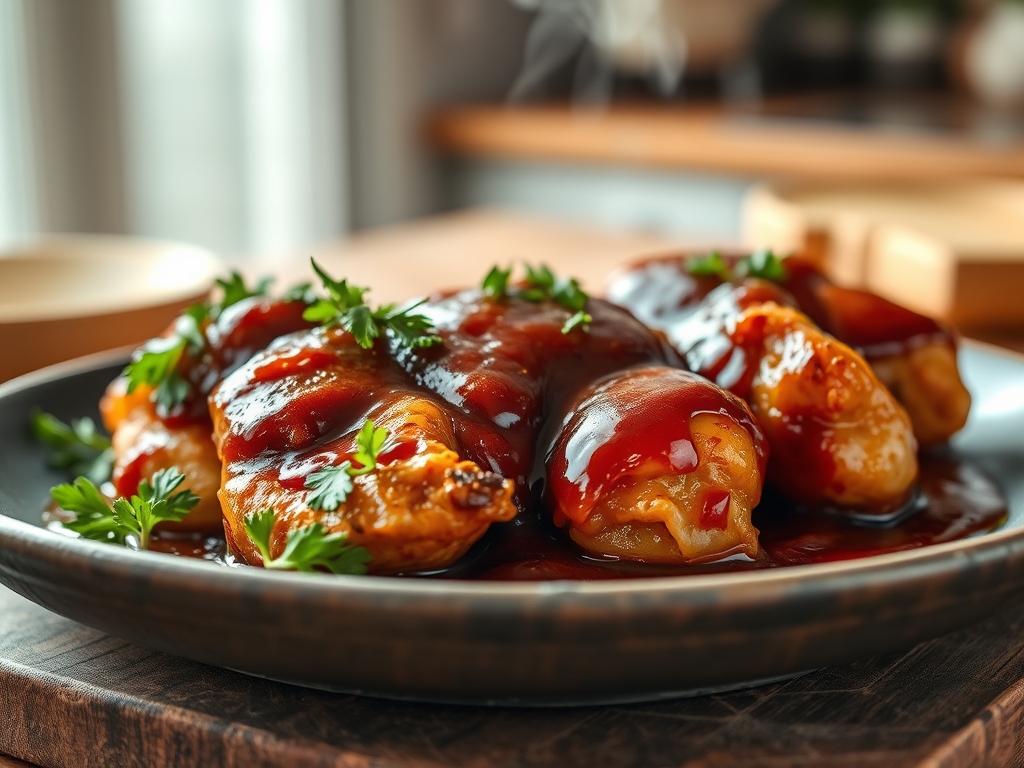
Imagine the sound of a heavy-bottomed skillet meeting a high-flame burner while the air fills with the scent of caramelizing sugars and piquant vinegar. When you master bbq sauce and chicken recipes, you are not just cooking; you are conducting a symphony of chemistry and flavor. It is the ultimate culinary hug that turns a Tuesday night into a gourmet event.
The Gathers:
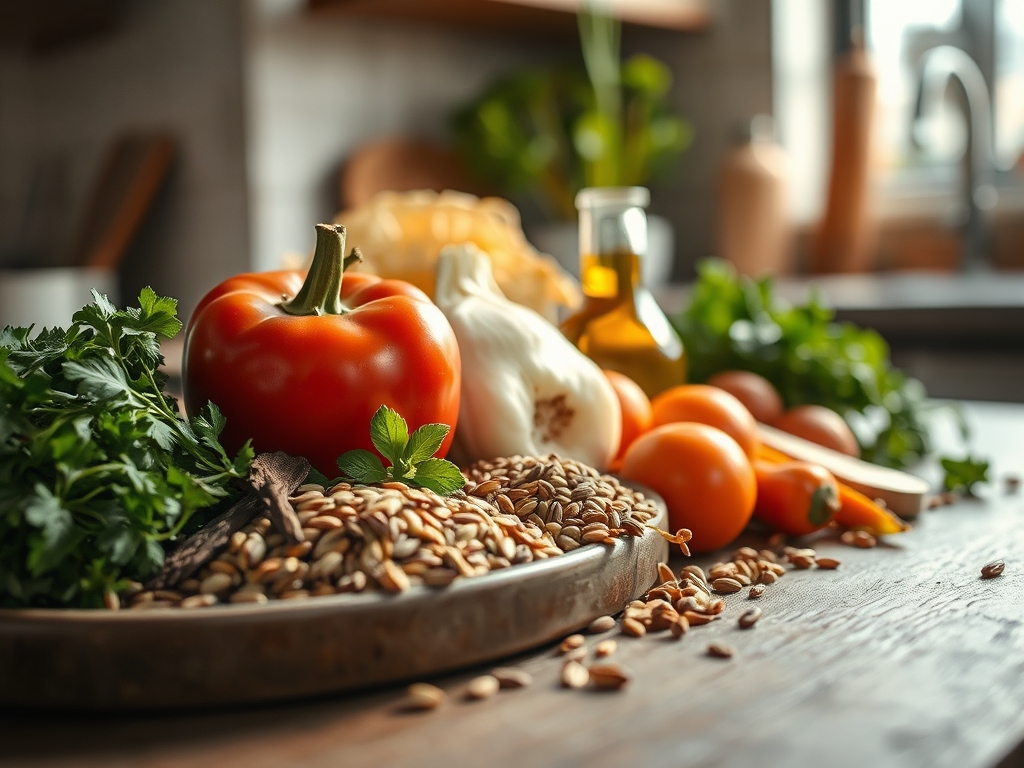
To begin your masterclass, arrange your mise-en-place with precision. You will need high-quality chicken cuts; thighs are preferred for their higher fat content which allows for better flavor absorption. Your sauce should be viscous and balanced. Use a digital scale to measure out 250 grams of your base sauce. Gather fresh aromatics like garlic and ginger. Use a microplane to grate these into a fine paste to ensure they melt into the glaze rather than burning on the surface.
Smart Substitutions: If you lack a traditional molasses-based sauce, you can create a quick substitute using tomato paste, maple syrup, and apple cider vinegar. To mimic the smoky profile of a charcoal grill, add two drops of liquid smoke or a teaspoon of smoked paprika. If you are watching your sodium, swap standard soy sauce for coconut aminos to maintain that deep umami undertone without the salt spike.
The Clock:
Efficiency in the kitchen is about the Chef's Flow. Expect 15 minutes of active prep time and approximately 30 to 45 minutes of cooking depending on your chosen method. The goal is to synchronize your tasks so that the chicken rests exactly as the sauce reaches its peak thickness. While the protein is in its initial sear, use that time to aerate your side dishes or prep your garnish. This prevents "dead time" and ensures every component hits the plate at the optimal temperature.
The Masterclass:
1. The Reverse Sear Method
Start your chicken in a low oven until it reaches an internal temperature of 145 degrees Fahrenheit. Only then should you move it to a hot pan to apply the sauce. This ensures the meat stays succulent while the exterior gets that iconic char.
Pro Tip: This technique utilizes thermal carryover. By finishing the chicken in the pan, you control the final five degrees of cooking, preventing the protein fibers from tightening and squeezing out moisture.
2. The Layered Glaze Technique
Do not dump all your sauce at once. Apply it in three thin layers during the last ten minutes of cooking. Use a silicone basting brush to coat every crevice.
Pro Tip: This facilitates Maillard reaction stacking. Each layer dehydrates and browns before the next is added, creating a complex, lacquered crust that a single heavy coating cannot achieve.
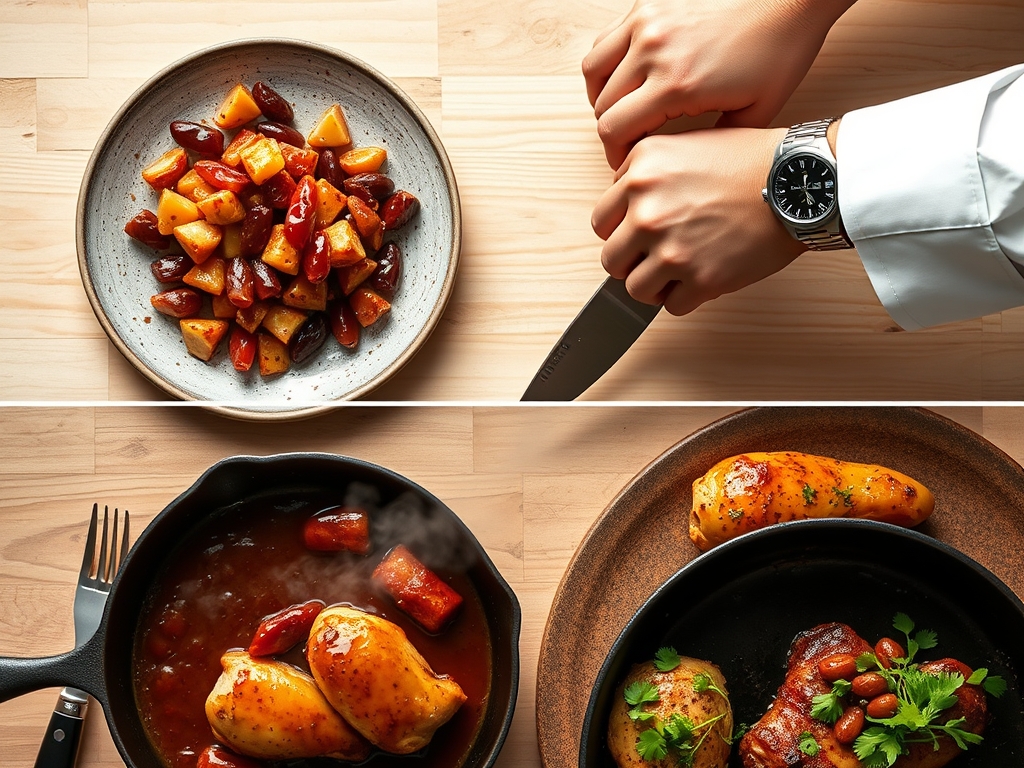
3. The Deglaze Infusion
After searing your chicken, remove it from the heavy-bottomed skillet. Add a splash of bourbon or apple juice to the pan to lift the browned bits, then stir in your bbq sauce.
Pro Tip: Deglazing captures the fond, which is the concentrated protein essence left in the pan. Incorporating this into your sauce adds a depth of flavor that tastes like it simmered for hours.
4. The Sous Vide Finish
For the ultimate texture, cook your chicken in a water bath first. Once tender, pat it bone-dry and flash-fry it in a wok with a high-sugar bbq sauce.
Pro Tip: Surface moisture is the enemy of browning. Drying the chicken ensures that the energy from the pan goes into caramelization rather than evaporating water.
5. The Slow Cooker Shred
Place chicken breasts in a slow cooker with a thin layer of sauce and a splash of chicken stock. Once cooked, use two forks or a stand mixer to shred the meat.
Pro Tip: Shredding increases the surface area of the meat. This allows the sauce to coat every individual fiber through capillary action, ensuring no bite is dry.
6. The Spatchcock Roast
Remove the backbone of a whole chicken so it lays flat. Slather the underside with a dry rub and the skin side with a vinegar-heavy bbq sauce.
Pro Tip: Flattening the bird ensures even heat distribution. The vinegar in the sauce acts as a tenderizer, breaking down tough connective tissues during the long roast.
7. The Air Fryer Crisp
Toss chicken wings in a light coating of cornstarch before air frying. In the last two minutes, toss them in a bowl of warmed bbq sauce and return to the basket.
Pro Tip: The cornstarch creates a microscopic porous surface. This allows the sauce to "anchor" to the wing, preventing it from sliding off into the bottom of the fryer.
8. The Smoked Lollipop Thighs
Trim the bone and skin of chicken thighs to create a "lollipop" shape. Smoke them at a low temperature and dip the entire bulb of meat into a saucier filled with warm sauce.
Pro Tip: Dipping provides a perfectly uniform emulsion. It ensures the sauce encapsulates the meat, creating a vacuum seal that locks in the rendered fat.
9. The Cast Iron Press
Use a heavy bacon press to push chicken skin directly against a hot cast iron surface. Brush the meat side with sauce while the skin side renders.
Pro Tip: This method maximizes conductive heat transfer. It creates a contrast between the shatteringly crisp skin and the sticky, sauce-laden meat.
10. The Cold-Whisk Emulsion
For a creamy bbq chicken salad, whisk your bbq sauce into a base of Greek yogurt or mayonnaise before folding in cooked, chilled chicken cubes.
Pro Tip: Whisking creates a stable emulsion. The fats in the dairy suspend the vinegar droplets from the sauce, resulting in a velvety mouthfeel that coats the palate.
The Deep Dive:
When analyzing the macro nutrition of bbq sauce and chicken recipes, the primary variables are sugar and lean mass. A standard 6-ounce serving of bbq chicken provides roughly 42 grams of protein. To keep it keto-friendly, utilize a sugar-free sauce sweetened with monk fruit. For vegan guests, the same techniques apply beautifully to smoked oyster mushrooms or jackfruit.
The Fix-It:
- Sauce is Burning: Your pan is too hot for the sugar content. Lower the heat and add a tablespoon of water to the pan to stop the oxidation.
- Sauce is Runny: The sauce hasn't reached the reduction point. Simmer it separately in a small saucepan until it coats the back of a spoon.
- Chicken is Dry: You likely bypassed the resting phase. Always let your chicken sit for five minutes to allow the juices to redistribute.
Meal Prep: To maintain "day-one" quality when reheating, avoid the microwave. Instead, use a covered skillet with a teaspoon of water. This creates a steam chamber that re-hydrates the sauce without toughening the protein.
The Wrap-Up:
Mastering these bbq sauce and chicken recipes is about understanding how heat interacts with sugar and protein. By using tools like your digital scale and heavy-bottomed skillet, you elevate a simple meal into a culinary triumph. Go forth, experiment with your glazes, and remember that the best secret ingredient is always a little bit of scientific curiosity.
The Kitchen Table:
How do I prevent bbq sauce from burning on the grill?
Apply the sauce only during the final 10 minutes of cooking. The high sugar content in most sauces undergoes pyrolysis quickly; adding it too early results in a bitter, blackened crust rather than a sweet glaze.
Can I use bbq sauce as a marinade?
Yes, but ensure it contains an acid like vinegar or citrus. The acid breaks down protein structures, allowing the flavors to infuse deeper into the meat. Always discard used marinade to avoid cross-contamination.
What is the best way to thicken a thin bbq sauce?
Simmer the sauce in a saucier over medium-low heat to evaporate excess water. For a faster fix, whisk in a small cornstarch slurry, which provides a glossy finish and immediate thickness through starch gelatinization.
Why does my chicken skin get rubbery under the sauce?
Rubbery skin happens when fat isn't fully rendered. To fix this, sear the chicken skin-side down until crispy before applying any sauce. The sauce should glaze the crisp skin, not soak into raw fat.