
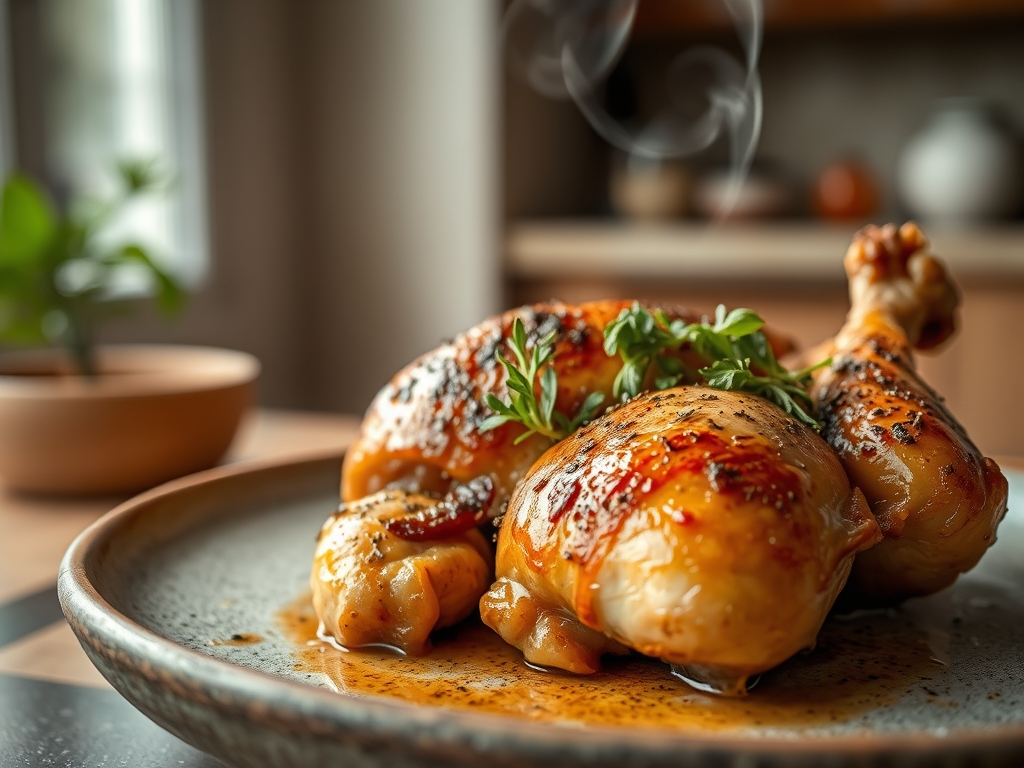
Close your eyes and listen for the sound of a knife edge dragging across a perfectly blistered, golden-brown skin. That shattering crunch is the holy grail of all air fryer roast chicken recipes; it is the sound of a successful Maillard reaction meeting high-velocity convection. We are not just making dinner tonight. We are conducting a delicious experiment in thermodynamics.
Forget the soggy, pale poultry of the past. When we harness the power of an air fryer, we are essentially using a miniature wind tunnel to strip moisture away from the surface of the bird while locking juices inside the muscle fibers. It is fast, it is efficient, and if you follow these eight secrets, it is foolproof. Whether you are hosting a last-minute dinner party or just treating yourself to a Sunday-style feast on a Tuesday, mastering this technique will change your kitchen hierarchy forever. Let us get into the chemistry of the crunch.
The Gathers:
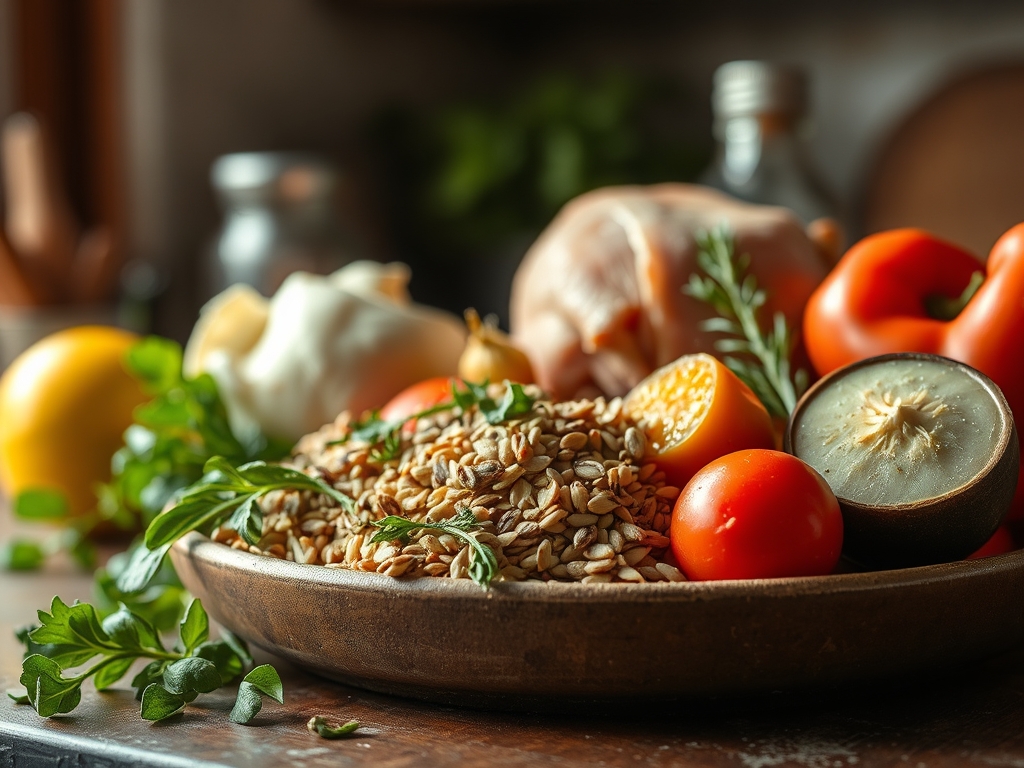
To achieve a masterpiece, your mise-en-place must be precise. Start with a three to four pound bird. This size is optimal for airflow within the basket. You will need high-smoke-point fats like avocado oil or clarified butter; extra virgin olive oil will smoke and turn bitter at these temperatures.
For your dry rub, gather kosher salt (the jagged crystals adhere better than table salt), smoked paprika for that piquant depth, garlic powder, and dried oregano. Use a microplane to zest a fresh lemon into your spice blend to add bright, volatile oils.
Smart Substitutions: If you are out of avocado oil, reach for ghee. It provides a nutty, viscous coating that aids in heat transfer. For a low-sodium version, swap half the salt for nutritional yeast; it provides a savory, umami-rich profile without the bloat. If you want a kick, a pinch of cayenne will infuse the fat with a slow-burn heat that lingers beautifully.
The Clock
The "Chef's Flow" is all about timing and temperature management. Expect a total active prep time of 15 minutes and a cook time ranging from 45 to 55 minutes depending on the weight.
- The Chill-Off (20 mins): Take the chicken out of the fridge to take the chill off. Cold protein shocks when hitting heat, causing fibers to tighten and squeeze out moisture.
- The Prep (15 mins): Drying, seasoning, and trussing.
- The Roast (50 mins): The actual air frying time.
- The Rest (15 mins): Non-negotiable time for juices to redistribute.

The Masterclass
1. The Desiccation Ritual
Use paper towels to pat the skin until it is bone dry. Moisture is the enemy of the crunch. If the skin is damp, the air fryer will spend the first ten minutes steaming the meat instead of roasting it.
Pro Tip: This is known as surface evaporation. By removing water, you allow the surface temperature to rise above 212 degrees Fahrenheit almost instantly, triggering the Maillard reaction for a deeper flavor profile.
2. The Internal Infusion
Season the cavity aggressively. Use your tongs to shove half a lemon and a head of garlic inside.
Pro Tip: Aromatics inside the bird create a flavored steam chamber. This infuses the meat from the inside out, ensuring the breast meat stays succulent while the exterior crisps.
3. The Fat Barrier
Massage your oil or ghee over every square inch of the skin. Do not forget the nooks of the wings and the underside of the thighs.
Pro Tip: Fat acts as a thermal conductor. It fills the microscopic gaps in the skin, creating an even surface that browns uniformly rather than in splotches.
4. The Trussing Technique
Use kitchen twine to tie the legs together. This prevents the wings and legs from burning before the thickest part of the breast reaches safety.
Pro Tip: Trussing creates a uniform shape, which minimizes the surface-area-to-volume ratio. This ensures thermal equilibrium, meaning the whole bird finishes cooking at the exact same time.
5. The Breast-Down Start
Place the chicken in the basket breast-side down for the first 25 minutes.
Pro Tip: This allows the fats from the dark meat to render and drip down into the white meat. It is a self-basting mechanism that protects the lean breast tissue from drying out during the initial high-heat blast.
6. The Mid-Way Flip
Carefully flip the bird using heavy-duty tongs and a silicone spatula to avoid tearing the skin.
Pro Tip: Flipping ensures that the "heat shadow" created by the bottom of the basket is eliminated. This promotes aeration around the entire circumference of the chicken.
7. The Digital Verification
Use a digital scale or, more importantly, a high-quality meat thermometer to check the internal temperature. Aim for 160 degrees Fahrenheit in the thickest part of the thigh.
Pro Tip: Thermal carryover will raise the internal temperature by another 5 degrees while the bird rests. If you wait until it hits 165 in the fryer, it will be overcooked by the time you eat.
8. The Sacred Rest
Move the chicken to a wooden carving board and wait. Do not tent it with foil, as this will trap steam and soften that hard-earned crust.
Pro Tip: Resting allows the muscle proteins to relax and reabsorb the liquid. If you cut it immediately, the juice will flood the board, leaving the meat dry and fibrous.
The Deep Dive
Macro Nutrition: A standard 4-ounce serving of air fryer roast chicken contains roughly 240 calories, 25g of protein, and 15g of fat. Because the air fryer allows excess fat to drip away into the tray, it is significantly leaner than traditional deep-frying.
Dietary Swaps: For a Keto version, ensure your rub contains zero sugar or cornstarch. For a Vegan alternative, this same rub and timing method works beautifully on a large head of cauliflower or a "roast" made of seitan.
The Fix-It:
- Skin is pale: You likely overcrowded the basket or didn't use enough fat. Next time, ensure there is at least an inch of space around the bird.
- Smoke in the kitchen: This happens when fat drippings burn in the bottom tray. Add a half-cup of water to the bottom of the air fryer drawer to keep the drippings cool.
- Meat is tough: You skipped the rest period. Patience is a culinary ingredient.
Meal Prep: To reheat and maintain "day-one" quality, put slices back in the air fryer at 350 degrees for 3 minutes. Avoid the microwave; it turns the skin into rubber and toughens the proteins.
The Wrap-Up
Mastering air fryer roast chicken recipes is about more than just a quick meal; it is about understanding how air, fat, and heat dance together. When you hear that first crackle of the skin, you will know you have graduated from a home cook to a kitchen scientist. Now, grab your bench scraper to clear your station, pour a glass of something crisp, and enjoy the best chicken of your life. You earned it.
The Kitchen Table
Can I cook a frozen chicken in the air fryer?
It is not recommended for a whole bird. The exterior will burn before the center thaws, leading to uneven cooking and potential food safety risks. Always thaw completely in the refrigerator before roasting for the best texture.
Why is my chicken skin rubbery instead of crispy?
Rubbery skin is usually caused by residual moisture or low temperatures. Ensure the skin is extremely dry before oiling and check that your air fryer is reaching at least 375 degrees Fahrenheit to properly render the subcutaneous fat.
Do I need to put oil in the air fryer basket?
You do not need to oil the basket itself, as most are non-stick. However, coating the chicken skin in a high-smoke-point oil is essential for heat conduction and achieving that signature golden-brown, crispy finish you desire.
What is the best way to season under the skin?
Gently loosen the skin over the breast with your fingers and slide in small pats of seasoned compound butter. This technique flavors the meat directly and prevents the lean breast tissue from drying out during the high-heat convection process.